
Tiling a Bathroom Floor: Laying It Right the First Time

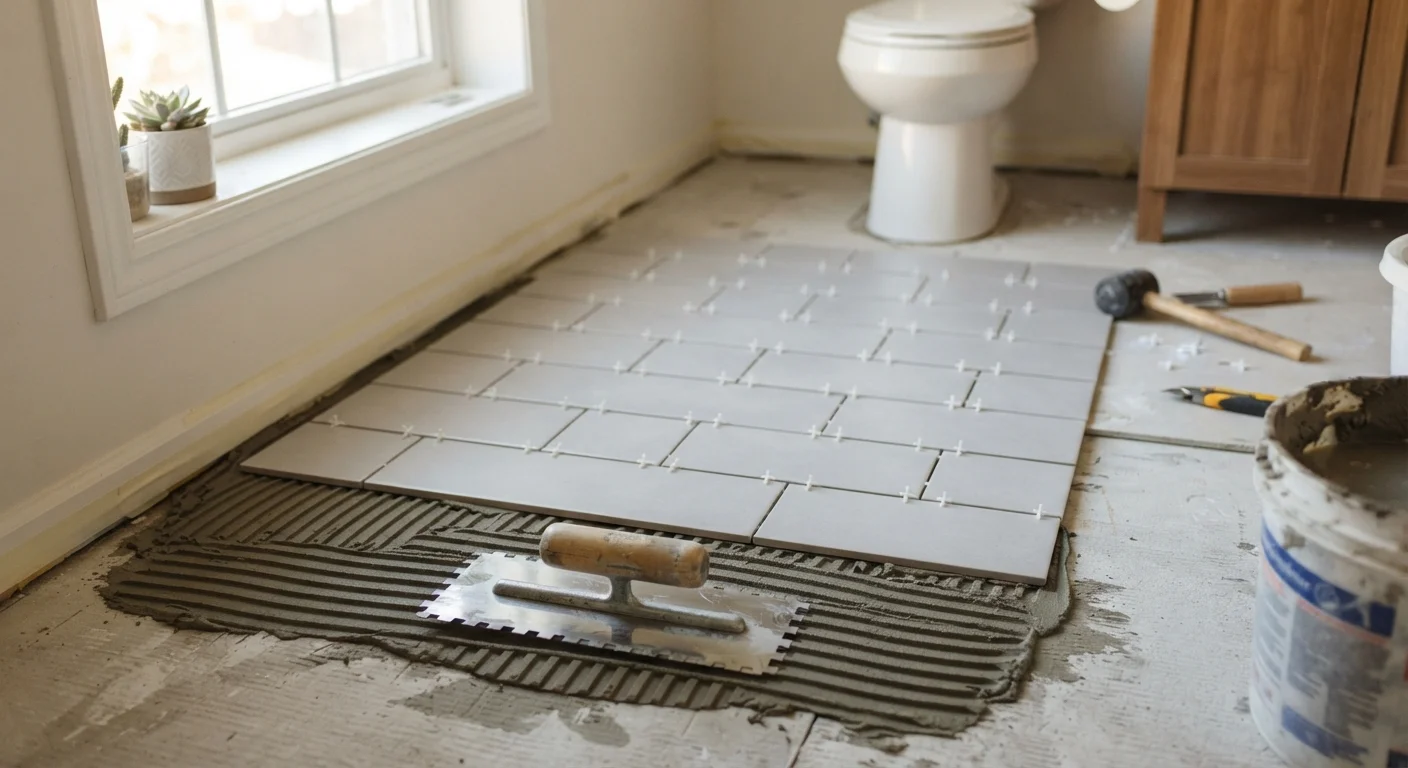
Photo: DockedReads.com | Information Made Easy editorial
Key Takeaways
- Dry-laying tiles before applying adhesive prevents costly mid-project mistakes.
- The subfloor must be clean, level, and structurally sound before any tile is set.
- Thinset mortar is the standard adhesive for bathroom floors due to its moisture resistance.
- Uniform grout lines and proper curing time are critical for a durable finish.
- Grouting and sealing should never be rushed — allow full adhesive cure first.
Why Preparation Makes or Breaks a Tile Job
Bathroom floor tiling is one of the most rewarding DIY upgrades a homeowner can tackle — but only when the groundwork is solid, literally and figuratively. Rushing past the prep phase is the single biggest reason tile floors crack, shift, or look uneven within a year of installation.
Before buying tile, review your project scope carefully. If you're new to home improvement projects, our pre-project planning checklist can help you avoid the most common budget and timeline pitfalls.
The subfloor — typically plywood or concrete backer board in a bathroom — must be flat, dry, and structurally firm. Any flex or soft spots will cause tiles to crack over time. Check for squeaks or give underfoot; if you find any, secure loose subfloor panels with screws before moving on. Use a long straightedge to identify high and low spots: anything more than ¼ inch over 10 feet needs to be leveled with floor-leveling compound or ground down.
What you will need
Once the subfloor passes inspection, sweep and vacuum thoroughly, then wipe with a damp cloth. Any dust, grease, or debris will compromise adhesive bonding. If you're tiling over an old vinyl floor, verify it's well-bonded and flat — some jurisdictions require removal if asbestos-containing materials are suspected in pre-1980 flooring. When in doubt, consult a professional.
Planning Your Layout and Cutting Strategy
Layout planning is where experienced DIYers separate themselves from beginners. The goal is to avoid having awkward slivers of tile at the most visible edges — typically the doorway and the wall you see first when entering.
Find the center of the room by snapping chalk lines between the midpoints of opposite walls. This creates four quadrants. Do a dry run: lay tiles out along both chalk lines without adhesive, using tile spacers to simulate grout joints. This reveals how the tiles will fall at the perimeter. If you'll end up with a cut tile less than half a tile's width at the edges, shift your starting point by half a tile to create a more balanced look.
Wet tile saw
Makes precise straight and angled cuts through ceramic, porcelain, or stone tile.
Notched trowel (¼-inch square notch)
Spreads thinset mortar at a consistent depth for proper tile adhesion.
Chalk line and measuring tape
Establishes accurate center layout lines across the bathroom floor.
Tile spacers
Maintains consistent grout joint width between tiles during setting.
Grout float
Presses grout into joints and removes excess without scratching tile surfaces.
Rubber mallet
Gently taps tiles into the mortar bed to ensure full contact and level alignment.
Level or straightedge
Checks that tiles are flat and consistent as you work across the floor.
Margin trowel
Mixes and transfers small amounts of thinset or grout during detailed work.
Mark your layout lines clearly. Work from the center outward, saving perimeter cuts for last. When cutting tiles around the toilet base, vanity, or door threshold, make a cardboard template first, trace it onto the tile, and cut with a wet saw. A wet saw (available at most tool rental shops) produces clean, precise cuts that a manual tile cutter cannot always achieve for complex angles.
Thoughtful layout also pairs well with design intent. If you're interested in how tile choices affect a small bathroom's feel, see our guide on small bathroom upgrades that make the room feel larger.
Setting Tile and Finishing the Floor
With layout confirmed and tools ready, you're set to begin setting tile. Work methodically through the steps below, and don't rush the curing or grouting stages — patience here is what produces a professional result.
Mix and apply thinset mortar
Mix thinset mortar according to package directions until it reaches a smooth, peanut-butter-like consistency. Working in one quadrant at a time, spread thinset with the flat side of a notched trowel, then comb through with the notched side held at a consistent 45-degree angle. Cover only as much area as you can tile within 20–30 minutes to prevent the mortar from skinning over.
Set tiles along your layout lines
Place the first tile at the center intersection of your chalk lines. Press firmly and give it a slight twist to embed it into the mortar. Use a rubber mallet to tap it level. Place spacers at each corner before setting adjacent tiles. Work outward from center in each quadrant, checking for level frequently with a straightedge. Remove any excess mortar that squeezes up into the joints before it sets.
Cut and set perimeter tiles
After the field tiles are set and cured, measure and mark each perimeter tile individually — walls are rarely perfectly straight, so measure each one rather than assuming they're uniform. Cut with a wet saw, then set using the same thinset process. Around the toilet flange and any floor penetrations, take extra care to fit cuts snugly, as gaps here can allow moisture intrusion over time.
Remove spacers and allow full cure
Once all tiles are set, remove the tile spacers before the thinset fully hardens — typically within a few hours of setting. Allow the thinset to cure fully before grouting: most products specify 24 hours minimum, but 48 hours is safer in a bathroom environment where humidity can slow curing.
Mix and apply grout
Mix grout to a smooth, lump-free consistency. Using a grout float held at a 45-degree angle, pack grout firmly into the joints by working diagonally across the tiles. Diagonal strokes prevent the float from dragging grout back out of the joints. Work in manageable sections — about 10–15 square feet at a time — to keep pace with cleanup before the grout hazes.
Clean and seal the finished floor
After 15–20 minutes, lightly mist the tile surface with water and wipe away grout haze using a damp sponge in circular motions. Rinse the sponge frequently and avoid flooding the joints. Allow grout to cure for the manufacturer's recommended period — typically 48–72 hours — before applying grout sealer. For most bathroom floors, a penetrating grout sealer applied with a small brush or applicator bottle provides the best moisture protection.
Once grouted and sealed, your tiled bathroom floor is ready for normal use. For homeowners continuing to build their DIY skill set, the home improvement beginner's guide covers the foundational tools and skills that make future projects easier.
Don't Skip Waterproofing at Transitions
The content on this site is for informational purposes only and is not a substitute for professional advice. Always consult a qualified professional for guidance specific to your situation.