
Kitchen Refresh Without a Full Renovation

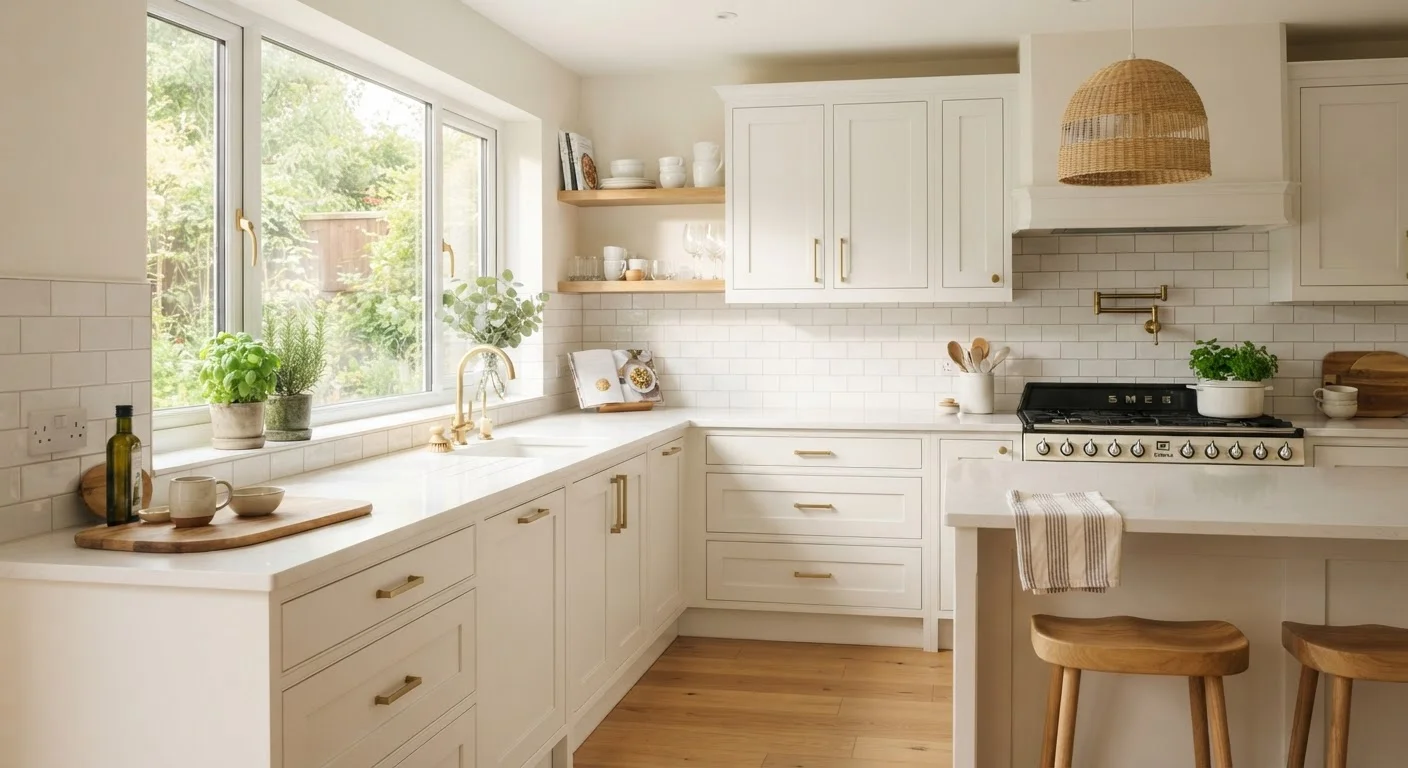
Photo: DockedReads.com | Information Made Easy editorial
Key Takeaways
- Replacing cabinet doors or repainting existing frames delivers dramatic visual change at a fraction of full renovation cost.
- Updating hardware is one of the fastest, most affordable ways to modernize a kitchen's overall look.
- Regrouting tile and refreshing caulk removes years of built-up grime and restores a clean, updated appearance.
- New lighting fixtures and under-cabinet lighting improve both function and atmosphere significantly.
- Focusing on high-impact surfaces — countertops, backsplash, and sink — maximizes visual return on investment.
Why Targeted Upgrades Outperform Gut Renovations for Most Homeowners
A full kitchen gut job — new layout, new plumbing, new everything — can easily run into five or six figures and displace your household for weeks. But in many kitchens, the bones are perfectly sound. The cabinets are well-built, the layout works, and the appliances are functional. What looks tired is often just surface-level: worn finishes, dated hardware, dingy grout, or inadequate lighting.
That's where targeted refreshes shine. By concentrating effort and budget on the elements people actually see and touch every day, you can achieve a transformation that reads as a full renovation to most visitors — without the structural disruption or the contractor invoice. If you want to understand what a full renovation actually entails before ruling it out, see the complete end-to-end renovation resource for comparison.
The upgrades below are organized by impact. Each is achievable for most homeowners with basic DIY skills, though some — particularly anything involving electrical work — should involve a licensed electrician.
Regrout and Recaulk Tile Surfaces
Grout and caulk age visibly — they absorb grease, soap, and moisture over years, turning from crisp white or gray to a streaked, dingy brown. Regrouting backsplash tile and recaulking the joint where countertop meets wall costs relatively little in materials and can be done over a weekend with a grout saw, grout float, and a tube of mildew-resistant caulk.
Remove old grout carefully using a manual or oscillating grout saw to avoid cracking tile. Clean thoroughly before applying new grout, pressing it firmly into joints and wiping the haze before it fully cures. Replace caulk at all transitions — around the sink, at corners, and where the backsplash meets the counter. Fresh, uniform grout lines make an entire tile surface look newly installed.
Fresh grout lines can make an entire tile surface look newly installed for minimal cost.
Replace or Repaint Cabinet Doors and Drawer Fronts
Cabinet boxes are usually structurally solid long after their doors look dated. You have two practical options: replace the doors and drawer fronts only (keeping existing hinges or upgrading to soft-close), or repaint the existing doors in place. Replacement doors are available in standard sizes from home improvement stores and specialty cabinet suppliers; repainting is more labor-intensive but preserves original profiles.
If painting, proper prep is everything. Degrease surfaces thoroughly with a TSP substitute, lightly sand, apply a bonding primer, and finish with a hard enamel paint formulated for cabinetry. Skipping prep leads to peeling within a year. Satin or semi-gloss finishes are easier to wipe clean than flat sheens — an important practical consideration in a kitchen environment.
Proper surface prep — degreasing, sanding, and priming — is the difference between paint that lasts and paint that peels.
Swap Out Cabinet Hardware
Hardware is the jewelry of a kitchen. Changing pulls and knobs from dated brass or builder-grade chrome to matte black, brushed nickel, or unlacquered brass takes an afternoon and requires only a screwdriver. When replacing pulls, measure the existing hole spacing (the distance between the two screw holes, called the center-to-center measurement) before purchasing — standard spacings are 3 inches and 3.75 inches, but variations exist.
If you want larger or differently configured pulls, you can fill old holes with wood filler, sand smooth, touch up paint, and drill new holes. This adds a step but opens up your hardware options considerably. Consistent hardware finish across cabinets, faucet, and light fixtures creates a cohesive, intentional look.
Matching hardware finish across cabinets, faucet, and fixtures creates a cohesive, intentional kitchen aesthetic.
Upgrade Lighting — Including Under-Cabinet Strips
Many kitchens rely on a single overhead fixture that creates flat, shadow-heavy light over work surfaces. Replacing a builder-grade flush-mount fixture with a pendant or semi-flush fixture that complements your updated cabinet style is a noticeable improvement — but the bigger functional gain comes from under-cabinet lighting.
Plug-in LED strip lights or puck lights can be added without any electrical work; hardwired options require a licensed electrician but provide a cleaner, more permanent installation. Under-cabinet lighting eliminates the shadow cast by your own body when working at the counter and genuinely improves how the space functions day to day. Any work involving your home's wiring should be performed by or reviewed by a licensed electrician.
Under-cabinet lighting eliminates counter shadows and transforms how a kitchen functions for daily tasks.
Update the Faucet and Sink Area
The sink area is a natural focal point, and a corroded faucet or stained undermount sink undermines even freshly painted cabinets. Replacing a faucet is within reach for most confident DIYers: shut off the supply valves under the sink, disconnect supply lines, remove the old unit, and install the new one following manufacturer instructions. Most standard kitchen faucets use a single or three-hole configuration — verify your sink's existing holes before purchasing.
If the sink itself is scratched or stained beyond cleaning, a drop-in replacement can often be swapped without modifying the countertop cutout. For any work involving mains supply connections or drain assembly changes, consult a licensed plumber to avoid leaks that could cause hidden water damage.
A corroded faucet undermines even freshly updated cabinetry — the sink area repays attention quickly.
Add or Replace a Backsplash
A new backsplash is one of the most transformative single-surface changes in a kitchen. If you currently have painted drywall behind the range and counter, adding even a simple subway tile backsplash introduces texture, color, and a surface that's far easier to clean. For existing tile that's structurally sound but visually tired, peel-and-stick tile panels are a renter-friendly option; traditional mortar-set tile is more durable for permanent installations.
Keep the design grounded: a backsplash that complements rather than competes with cabinet color and countertop material produces the most lasting results. Neutral tones — white, soft gray, warm cream — tend to age well and accommodate future updates to other surfaces without clashing.
A new backsplash introduces texture and color while providing a surface far easier to wipe clean than painted drywall.
Getting the Most From Your Kitchen Refresh
Approach these projects in sequence rather than all at once. Start with cleaning and regrouting, since fresh grout changes the entire visual baseline and reveals what else actually needs updating. Hardware and paint come next, followed by lighting. Countertop or backsplash work is typically the most involved and benefits from a cleaner, already-updated backdrop to guide your material choices.
Plan Your Refresh in Phases
The same logic that applies here works across the home. The small bathroom upgrades guide applies many of these same surface-level principles to compact bathrooms. And before diving into any home project, it's worth reviewing common home maintenance myths to avoid costly assumptions. Work within your skill level, pull permits where required, and hire licensed trades for anything involving gas, structural changes, or complex electrical work.
The content on this site is for informational purposes only and is not a substitute for professional advice. Always consult a qualified professional for guidance specific to your situation.